Product
Meet Pixie, the Smart Hose Faucet Timer

The Netro App
1. Download the Netro app - if you do not already have the Netro app on your mobile device, search for Netro and download the free Netro app in Google Play store or App Store.
2. Launch the Netro app - Create a Netro account or login with an existing Netro account to start setting up the timer. If you are using other Netro products, you do not need to create another account, instead you can add your timer to the same account.
Setup the Timer in the App
1. Turn on your timer by pressing the button on the unit for 3 seconds. The timer will also turn on automatically when the battery is installed.
2. The first time you turn on your timer, the LED light will start to blink in white color, indicating that it is ready to connect to WiFi (we call this “Host” mode). If you are not ready to connect yet, no worries. Press the button for 3 seconds again to turn off your timer.
3. Stay close to your router, follow the steps in the Netro app to add your timer to your Netro account.
Install the Timer
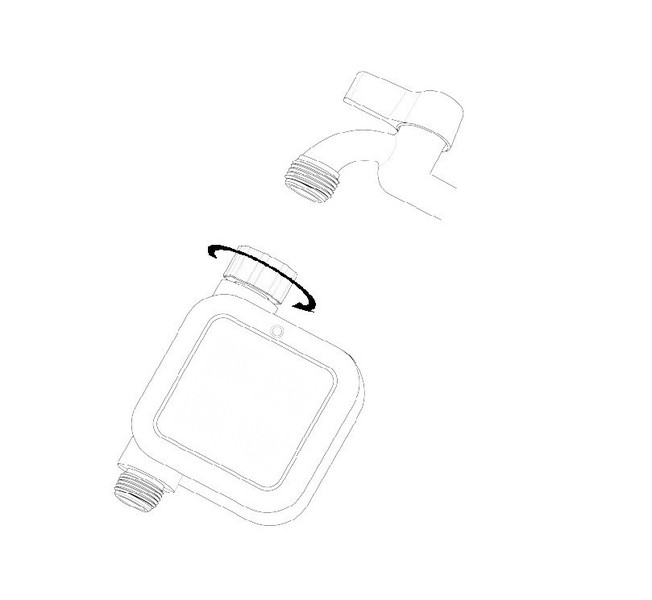
1. Connect the timer to an outdoor hose faucet.

2. Test the WiFi signal.
1. Press the power button for 3 seconds to turn on the timer. If the timer is already on, turn it off first by pressing the power button for 3 seconds.
2. The timer will try to connect to the router.
3. Wait for 15-30 seconds.
4. If the connection is successful, the LED light will become green.
5. If the connection is unsuccessful, the LED will turn red. You might need to move closer to the router (within 100 feet in most cases).
3. Turn on your water. The water must remain on for the timer to work properly. Make sure there is no water leakage before you leave.
4. Quickly press the button twice to test the water. Quickly press the button twice again to manually turn off the water.
5. Do not power off the timer. The timer will go to sleep mode in a few minutes to save power. It will periodically wake up for data synchronization with the server.
Weather Data
Once your Pixie is added to your account through the Netro app, the Netro cloud server automatically acquires the local weather data for adjusting the watering schedules.
- Change providers
By default, your Pixie is connected to DarkSky for weather data. You can change it to a different weather source in the Netro app -> Settings -> Timer -> Weather Provider.
Delayed Manual Run
You can remotely schedule a watering from the homepage of the Netro app. When the timer is sleeping, the manual run will start when the timer wakes up. To change the sync frequency, go to the Netro app and find Settings->Timer->Sync Frequency.
Smart Zone
Your Pixie optimizes the watering schedules based on weather conditions and watering regulations. You can select the Smart level for each zone in the Netro app -> Settings -> Garden -> Smart Zone.
- Advanced:
Your Pixie automatically creates smart watering schedules based on moisture level and watering regulations. User programs will be skipped based on local weather conditions.
- Basic:
No smart watering schedules will be created and you need to setup user programs in Settings->Programs. Your Pixie skips user programs based on local weather conditions and watering regulations.
Battery
Your Pixie is powered by a rechargeable advanced lithium battery which is charged by solar energy.
1 hour of charge can generally provide 1-2 days of normal operation.
Sunlight Requirements:
Make sure the solar panel can receive at least 1 hour of direct sunlight on a sunny day. In cloudy weather conditions, try to position the solar panel to allow as much access to sunlight as possible.
What if the battery on the timer runs out?
The timer will stop functioning. When you press the power button, the LED light will flash in red indicating low battery.
You will have to use sunlight to charge it for at least 4 hours before turning it on again.
If your battery is not holding a charge, or you believe it has stopped working, please email to support@netrohome.com. Do not open the battery.
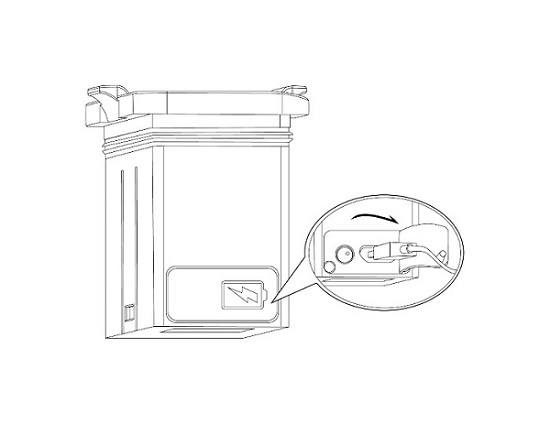
You can also remove the battery from the timer and charge it through the included cable.
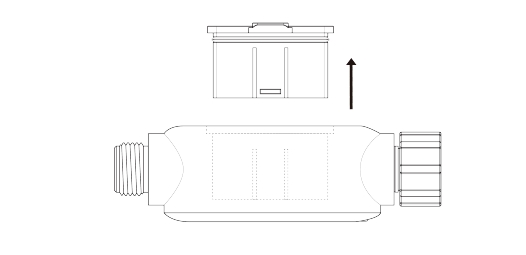
1. Remove the battery from the back of the timer.

2. Plug in the included cable to charge the battery from a USB port. The light on the battery will change from red to green when the battery is fully charged.

The LED Light
The LED light on your Pixie has 6 possible statuses:
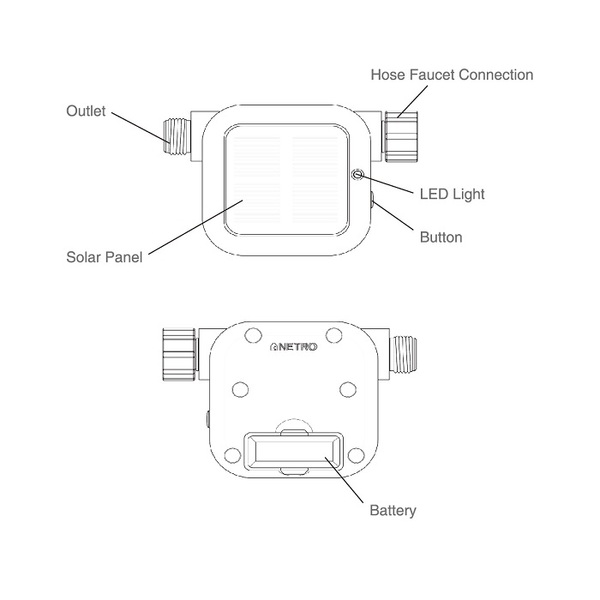
Blinking slowly in white: the timer is in its HOST mode. This happens when you first turn on your timer or reset it, and indicates that it needs to go through the setup steps in the app to connect to a home WiFi network.
Solid white: the timer is starting up and will try to connect to the WIFi network.
Solid green: the timer is connected to the WiFi network.
Solid red: the timer is unable to connect to the WiFi network.
Flash in red and turn off: battery is low. This happens when you try to turn on your timer.
Solid Blue: the timer is watering.
The Button
The button can be used to power on/off the timer, manually turn on/off the water and reset the timer to its HOST mode for WiFi setup.
Power on the timer: Press the button for 3 seconds. Wait until the LED light becomes green or red. If the LED light does not turn on or flashes in red immediately, the battery is low in energy and needs to be charged.
Power off the timer: Press the button for 3 seconds.
Manually turn on/off the water: If the timer is off, power on the timer first. Make sure the LED light is green or red. Quickly press the button twice.
Reset the timer to its HOST mode: If the timer is off, power on the timer first. Make sure the LED light is green or red. Press the button for 12 seconds. The LED light will start blinking in white.