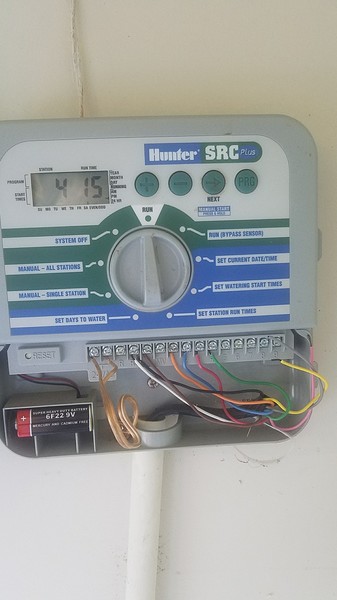
Replacing Hunter system
This page lists some instructions about replacing the common types of Hunter system with Netro smart watering controller.
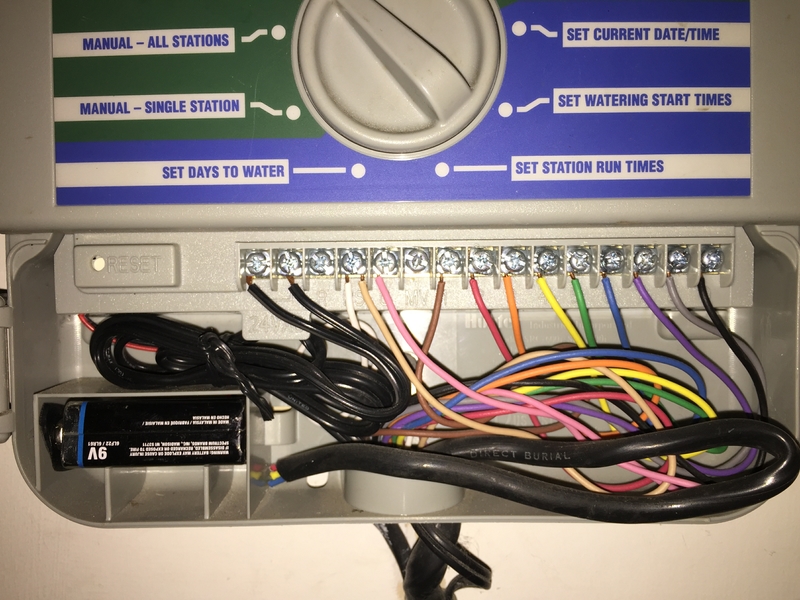
Example 1:
To replace this controller with Netro smart watering controller, please follow the instructions.
The white wires are the common wires which should be connected to the C slots in Netro. Then the zone wires (1,2,3, .. 12) are directly mapped to the 1, 2, 3 .. 12 slots in Netro. The last step is to connect the power (the ground wire is not needed for Netro) then you should be good to go. The power adapter wires are the 2 yellow wires on the left side.
The green one below the yellow wires is the ground wire which is not needed for Netro.
The copper wires are rains sensors which are not needed for Netro either because Netro gets the weather information from WiFi network.
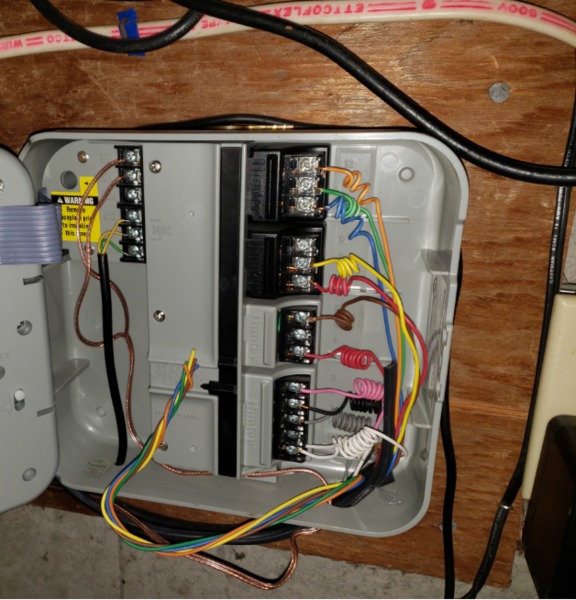
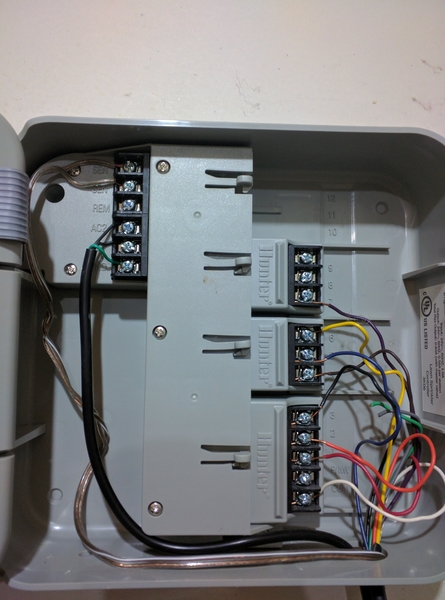
Example 2:
For this system, please connect the white wire to any one of the C slots in Netro. You can leave the M slot of Netro smart watering controller and one of the C slot unconnected.
The last step is to connect the power. The power adapter wires are the 2 yellow wires on the left side.
SEN are rains sensors which are not needed for Netro either because Netro gets the weather information from WiFi network.
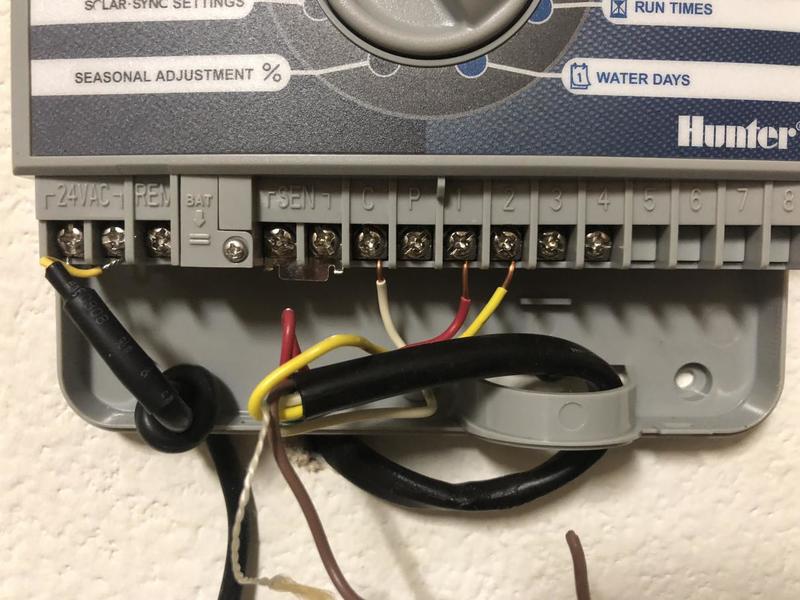
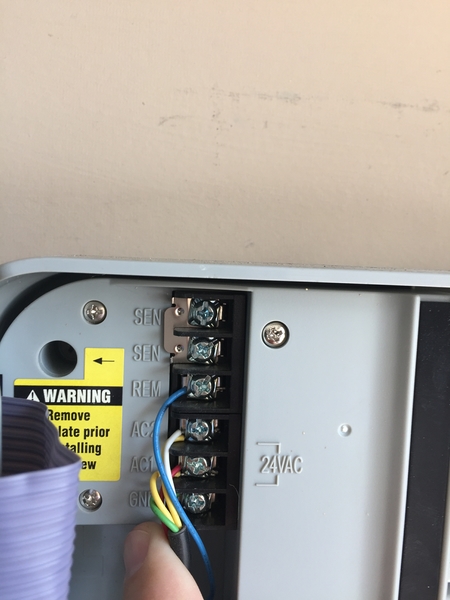
Example 3:
Please connect the white wire to any one of the C slots in Netro. You can leave one of the C slot unconnected.
This system has 3 wires which connects to 24v lines. To replace it with Netro smart watering controller, you can use the existing 24V power(the yellow wires) for your Sprite. It looks like the thinner 2 are the ones but you might just want to try them on Sprite. Or you can use a voltage meter to determine.
If the thinner yellow wires turn out to be the power, than I think the thinner white wire is the common wire which should go to the C slot in Sprite.
SEN are rains sensors which are not needed for Netro either because Netro gets the weather information from WiFi network.
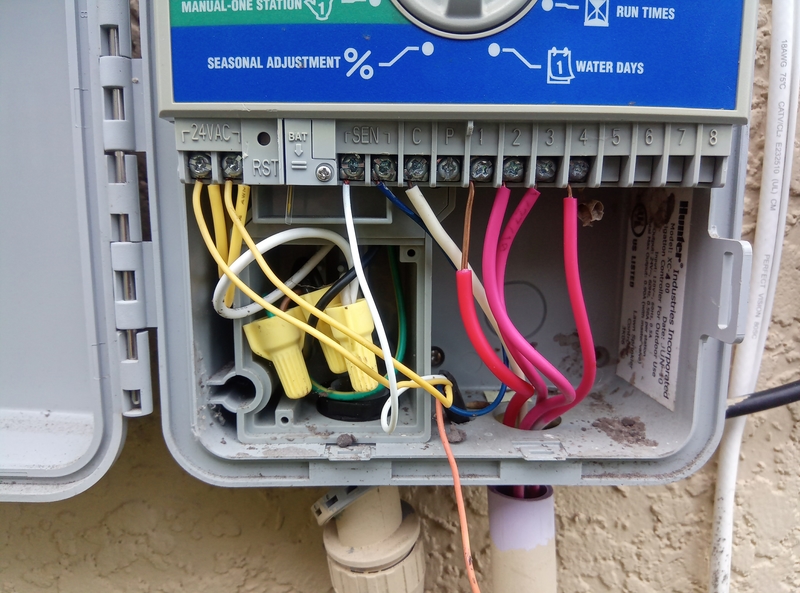
Example 4:
You should connect the white wire(currently on RS) to one of the C slots in Sprite.
You do not need to connect the black wire(currently on C) and the brown wire(currently on RS). RS terminal is the rain sensor. Therefore, you do not need to connect these wires.
Example 5:
The white wire is the common wire which should be connected to one of the C slots in Netro. The power adapter wires are the 2 black wires on the left side.
RS terminal is the rain sensor. Therefore, you do not need to connect these wires.
Example 6:
The white wires is the common wires which should be connected to one of the C slots in Netro. The power adapter wires are the two black wires on the left side.
The green one below is the ground wire which is not needed for Netro.
You do not need to connect the rain sensors because Netro get the weather forecast through WiFi.
Example 7:
You do not need to connect the blue one (remote). You can just leave it dangling but please use the tape to cover the metal head. The remote feature in Sprite is through the WiFi.
I am not sure about the red and white one. These are the two AV power wires. Normally there is only one wire for AC1 and one wire for AC2. In your case, it looks like the AC power is also sent to another device. The safest way to handle this is to keep this original connection. You might want to "noodle" the wires and insert them into the two "24 VAC" slots in Sprite. Please check out this connector for wire junctions:
https://www.amazon.com/Gardner-Bender-25-AWC-Assortment-Resealable/dp/B000F5TTE8